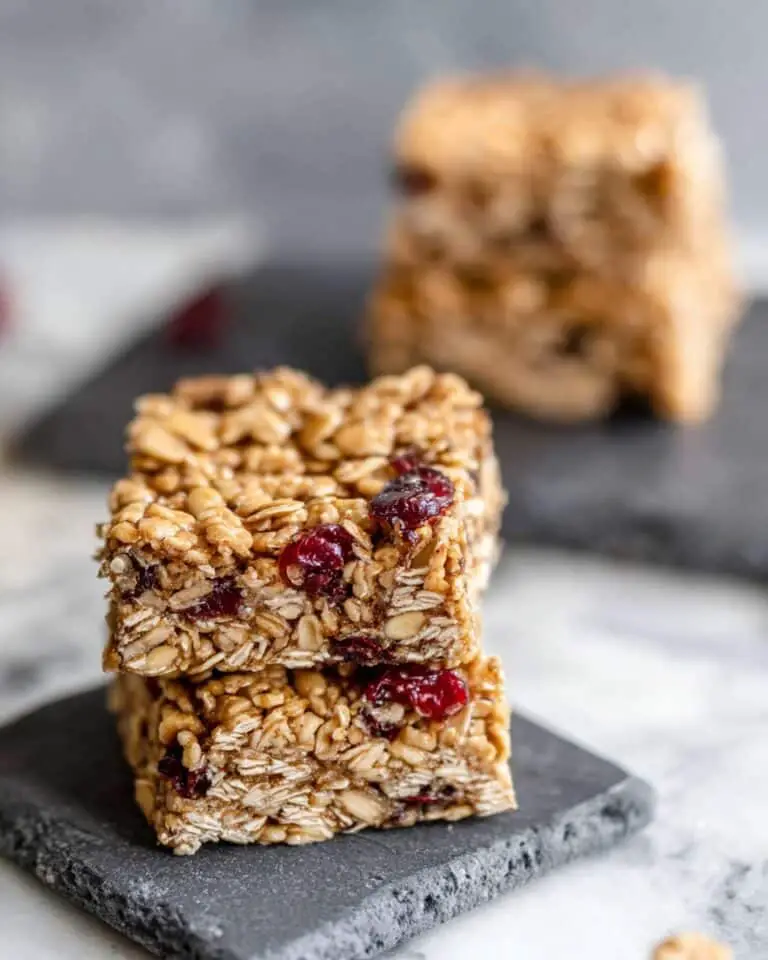
If you are craving a snack that combines wholesome ingredients with delightful flavors and textures, then you will absolutely love this Homemade Gluten-Free Peanut Butter Granola Bars Recipe. These bars are a perfect balance of creamy peanut butter, natural sweetness from honey, and a satisfying crunch from oats and pepitas. They come together quickly, require minimal ingredients, and offer a naturally gluten-free treat that’s perfect for breakfast on-the-go, an afternoon pick-me-up, or an energizing post-workout bite. Trust me, once you try these bars, they’ll become a staple in your snack rotation!
Ingredients You’ll Need
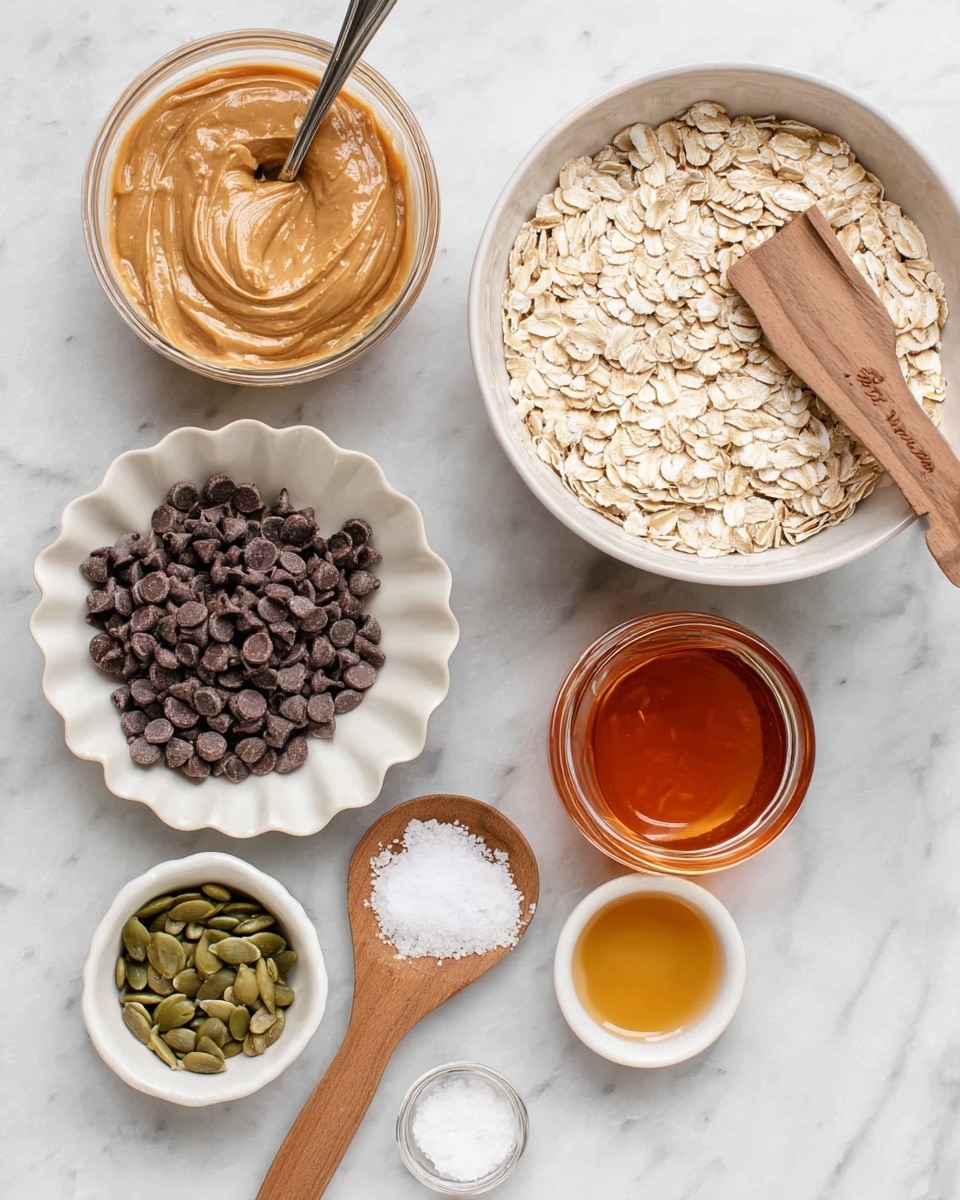
Getting the ingredients right is key to making the perfect texture and delightful flavor of these bars. Each one is simple but essential, coming together to form that irresistible combination of creamy, chewy, and crunchy.
- 1 cup very smooth creamy natural peanut butter: This adds richness and helps bind the bars together; use cashew butter as a delicious alternative.
- ⅔ cup honey: Provides a natural sweetness and sticky texture to hold everything in place.
- 1 teaspoon vanilla extract: Enhances the overall flavor with a warm, sweet note.
- Heaping ½ teaspoon sea salt: Balances the sweetness and brings out the nuttiness.
- 2½ cups whole rolled oats: The hearty base offering chewiness and fiber, make sure they’re certified gluten-free.
- ⅓ cup mini chocolate chips: Adds delightful bursts of chocolate while keeping bars cohesive.
- 3 tablespoons pepitas (or crushed peanuts or cashews): Brings a satisfying crunch and a lovely nutty flavor.
How to Make Homemade Gluten-Free Peanut Butter Granola Bars Recipe
Step 1: Prepare Your Pan
Start by lining an 8×8 baking pan with parchment paper. This step is crucial because it allows you to easily remove the bars once they are set, making slicing neat and simple.
Step 2: Mix the Wet Ingredients
In a large mixing bowl, combine the creamy peanut butter, honey, vanilla extract, and sea salt. Stir everything together until the mixture is pleasantly smooth and evenly blended. This is the flavorful glue that will hold your bars together perfectly.
Step 3: Add the Dry Ingredients
Next, stir in the rolled oats, mini chocolate chips, and pepitas (or your choice of nuts). At first, it might look like the mixture is a bit dry and crumbly, but don’t give up! Keep your enthusiasm and keep stirring—it will come together beautifully, forming a slightly sticky dough.
Step 4: Press and Chill
Transfer the mixture to your prepared pan and press it firmly and evenly. An excellent trick is to use a second piece of parchment paper on top and the back of a measuring cup to compact and smooth the surface. This ensures the bars hold together well after chilling. Pop the pan into the fridge for at least one hour to let everything set.
Step 5: Slice and Enjoy!
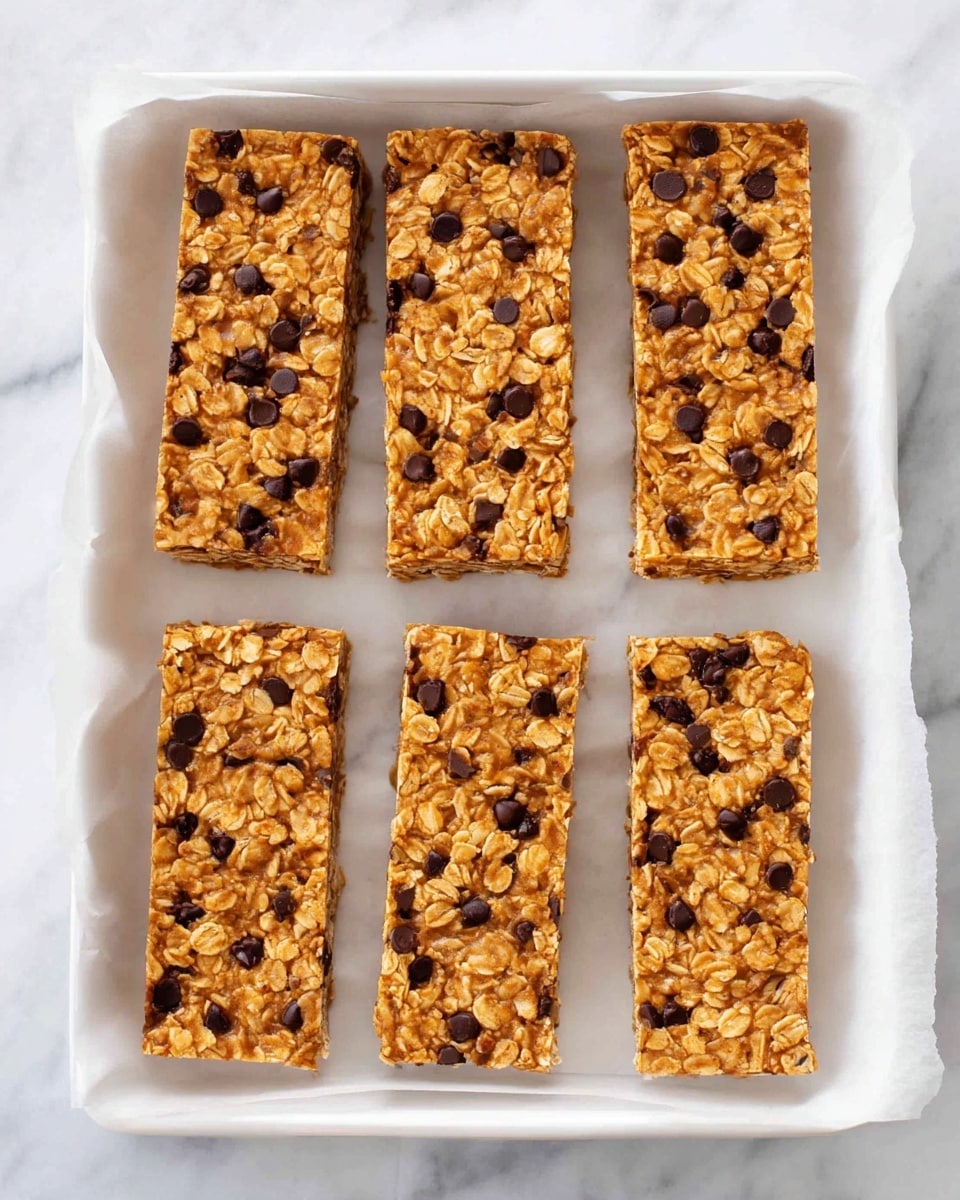
Once chilled and firm, lift out your granola slab using the parchment paper and slice it into 8 bars. These are now ready to be enjoyed as a wholesome snack packed with peanut buttery goodness and a delightful crunch!
How to Serve Homemade Gluten-Free Peanut Butter Granola Bars Recipe
Garnishes
Sprinkle a few extra pepitas or chopped nuts on top of each bar before pressing the mixture into the pan for added visual appeal and an extra layer of crunch. You can also drizzle a bit of melted chocolate over the bars once chilled for chocolate lovers.
Side Dishes
Pair these granola bars with a tall glass of cold milk, a fresh fruit salad, or a creamy yogurt parfait. This combination makes for a satisfying breakfast or a balanced afternoon snack that keeps energy levels steady.
Creative Ways to Present
Wrap individual bars in parchment paper or reusable wax wraps for an easy grab-and-go snack. You can also stack them in a pretty jar or tin as an inviting homemade gift for friends and family, complete with a handwritten tag sharing this beloved Homemade Gluten-Free Peanut Butter Granola Bars Recipe.
Make Ahead and Storage
Storing Leftovers
Keep your granola bars stored in an airtight container in the refrigerator to maintain their freshness and prevent the peanut butter from becoming oily. Stored this way, they’ll stay delicious for up to a week, making snack time worry-free.
Freezing
If you want these bars to last even longer, freeze them in a freezer-safe container or individually wrapped. Frozen bars can last for up to 3 months and simply need to be thawed at room temperature or in the fridge before eating, ensuring you always have a nutritious treat on hand.
Reheating
These granola bars are best enjoyed cold or at room temperature, so reheating isn’t usually necessary. However, if you prefer a softer texture, you can warm them gently in the microwave for 10-15 seconds. Just remember, they might become a bit gooey, but still delicious!
FAQs
Can I substitute the peanut butter?
Absolutely! Cashew butter or almond butter can be used as great alternatives. Just make sure they’re smooth and natural for the best consistency and flavor.
Are these granola bars suitable for a vegan diet?
Yes, you can make this recipe vegan by swapping honey with brown rice syrup. Maple syrup isn’t sticky enough to hold bars together but works well if you roll the mixture into energy balls instead.
How do I make sure the bars are gluten-free?
The key is using certified gluten-free rolled oats. Many oats can be cross-contaminated, so choosing this certification keeps your snack safe and gluten-free.
Can I add other mix-ins?
Definitely! Feel free to add dried fruits, seeds, or even shredded coconut. Just keep the proportions similar so the bars still hold together well.
Why do mini chocolate chips work better than regular ones?
Mini chocolate chips distribute more evenly and help maintain the bars’ cohesion, while regular chips can make the texture crumbly and harder to hold together.
Final Thoughts
This Homemade Gluten-Free Peanut Butter Granola Bars Recipe is a delicious way to enjoy a homemade treat that feels special but is incredibly simple to whip up. The perfect balance of creamy, crunchy, and sweet will make these bars your go-to snack. I can’t wait for you to try them and share this little secret with your closest friends and family—you’re going to love how tasty and nourishing these bars are!
Print
Homemade Gluten-Free Peanut Butter Granola Bars Recipe
- Total Time: 1 hour 5 minutes
- Yield: 8 bars
- Diet: Gluten Free
Description
These homemade granola bars are a quick, delicious, and naturally gluten-free snack option. Made with creamy natural peanut butter, honey, rolled oats, mini chocolate chips, and pepitas, they offer a perfect balance of sweetness and texture. Perfect for breakfast on the go or a healthy snack, these bars can be customized with various mix-ins to suit your taste.
Ingredients
Wet Ingredients
- 1 cup very smooth creamy natural peanut butter or cashew butter
- ⅔ cup honey
- 1 teaspoon vanilla extract
- Heaping ½ teaspoon sea salt
Dry Ingredients
- 2½ cups whole rolled oats
- ⅓ cup mini chocolate chips*
- 3 tablespoons pepitas, or crushed peanuts or cashews
Instructions
- Prepare the Pan: Line an 8×8 baking pan with parchment paper to ensure easy removal of the granola bars after chilling.
- Mix Wet Ingredients: In a large bowl, stir together the peanut butter, honey, vanilla extract, and sea salt until the mixture is smooth and well combined.
- Add Dry Ingredients: Incorporate the rolled oats, mini chocolate chips, and pepitas or nuts into the wet mixture. Initially, the mixture may appear dry, but continue stirring until it comes together into a cohesive mass.
- Press Mixture into Pan: Transfer the mixture to the lined baking pan. Use a second piece of parchment paper and the back of a measuring cup to firmly and evenly press the mixture down, creating a compact layer.
- Chill: Place the pan in the refrigerator and chill for at least 1 hour to allow the bars to set and firm up.
- Slice and Store: Once chilled, remove from the pan, slice into bars, and store them in the refrigerator to maintain freshness.
Notes
- Regular-sized chocolate chips can make the bars less cohesive; if mini chocolate chips are unavailable, chop regular chocolate into small pieces to achieve a similar effect.
- To make these bars vegan, substitute honey with brown rice syrup. Note that maple syrup is not sticky enough for bars but works well if rolling the mixture into energy balls instead.
- To make the recipe gluten free, ensure that the oats used are certified gluten free.
- Prep Time: 5 minutes
- Cook Time: 0 minutes
- Category: Snack
- Method: No-Cook
- Cuisine: American

