If you’ve ever craved a snack that combines the comforting texture of perfectly cooked sushi rice with a kick of spicy, creamy tuna, then this Spicy Tuna Onigiri Recipe is your new best friend. These Japanese rice balls are wonderfully satisfying, portable, and filled with a luscious blend of tuna, mayo, and sriracha that creates a flavor explosion in every bite. With just a handful of simple ingredients and a little love, you can create this iconic street food right in your own kitchen, perfect for lunch, a light dinner, or an impressive addition to any picnic or party spread.
Ingredients You’ll Need
The beauty of this Spicy Tuna Onigiri Recipe lies in the simplicity of its ingredients, each thoughtfully chosen to build layers of flavor, texture, and visual appeal. From the sticky sushi rice that holds everything together to the vibrant scallions that add freshness, every component plays a crucial role.
- Japanese short-grain rice (1½ cups): The sticky texture of this rice is essential for shaping the onigiri and giving it that authentic sushi feel.
- Cold water (15 fluid ounces): Proper hydration ensures the rice cooks evenly and stays fluffy, not mushy.
- Kosher salt: Adds a subtle seasoning to both the rice and the hands during shaping, enhancing overall flavor without overpowering.
- Portofino Solid Albacore Tuna in Extra Virgin Olive Oil (4.5-ounce can): This tuna provides a rich, olive oil-infused base for your spicy filling—the heart of the dish.
- Mayonnaise (1½ tablespoons): Adds creaminess and balances the heat from the sriracha.
- Sriracha hot sauce (1 teaspoon): Delivers the signature spicy kick that makes this recipe stand out.
- Rice vinegar (½ teaspoon): Adds a gentle tang that brightens the filling and complements the tuna.
- Scallion green parts (1 scallion, finely sliced): Gives a fresh, slightly sharp flavor and a vibrant green color to the filling.
- Toasted black sesame seeds (optional): Sprinkled on the finished onigiri for an eye-catching contrast and a hint of nutty aroma.
- Toasted nori sheets (3 sheets, cut crosswise in half): Wrap around each onigiri for the traditional salty crisp and easy handling.
How to Make Spicy Tuna Onigiri Recipe
Step 1: Prepare the Sushi Rice
Start by thoroughly rinsing the short-grain rice in cold water using your fingers until the water runs clear. This crucial step removes excess starch to prevent gummy rice and ensures a clean, pearly grain texture when cooked. After draining, combine the rice with cold water in a rice cooker for fuss-free perfect rice every time. If you don’t have a rice cooker, simmer the rice gently in a saucepan with a tight-fitting lid, then let it steam covered with a kitchen towel to absorb every drop of flavor and achieve ideal fluffiness.
Step 2: Make the Spicy Tuna Filling
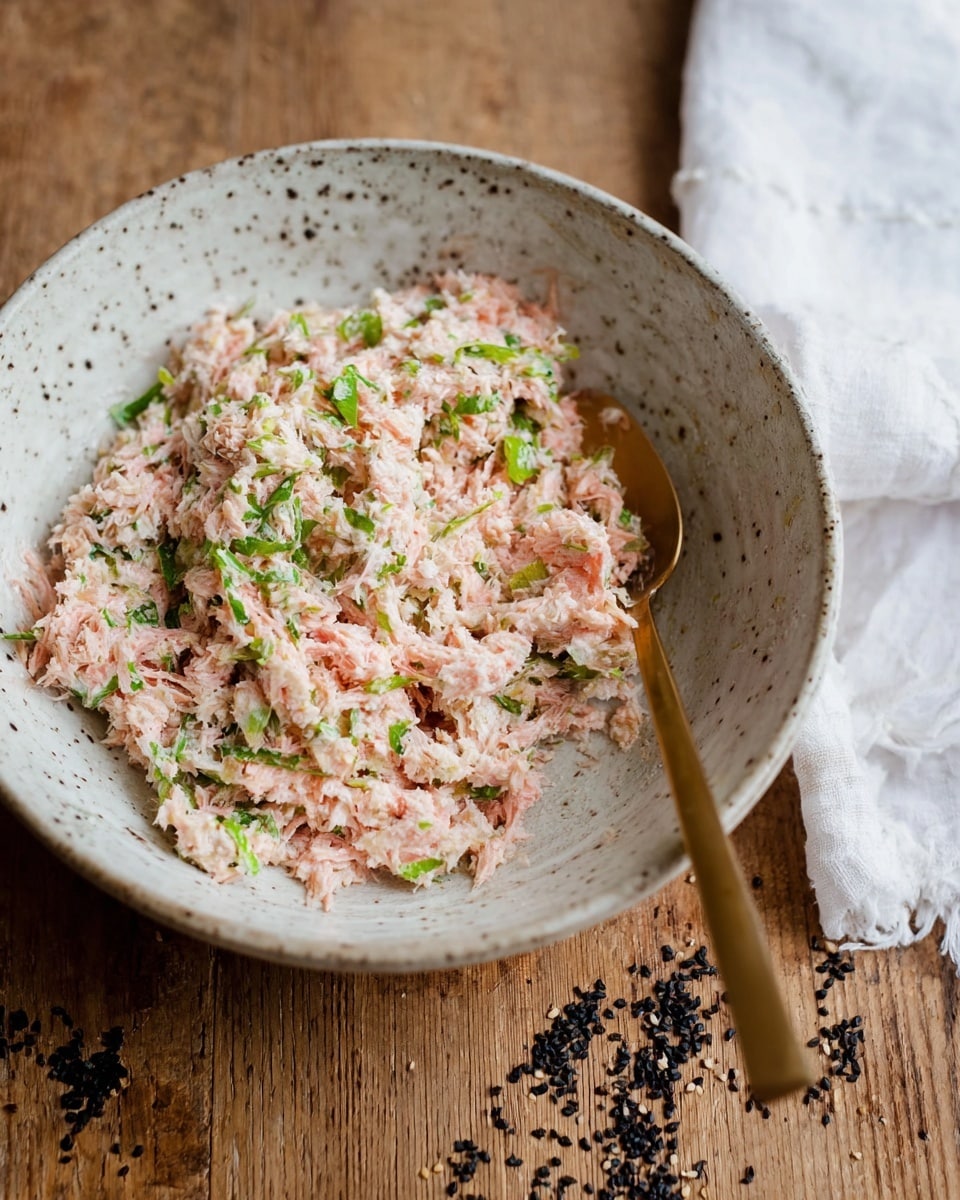
While the rice cools, mix together the drained olive oil-packed tuna with creamy mayonnaise, spicy sriracha, and a touch of rice vinegar for brightness. Fold in finely sliced scallions for that fresh snap of green that complements the richness of the tuna. The result is a creamy, mildly spicy filling bursting with umami and texture.
Step 3: Shape the Onigiri
To make shaping easier and avoid sticky hands, keep a bowl of room temperature water nearby. Dip your hands in water, then lightly sprinkle kosher salt on your palms, which seasons the rice from the outside and aids preservation. Take about half a cup of sushi rice and gently press it into an oblong shape, then create a small pocket in the center for a generous tablespoon of spicy tuna filling. Carefully cover the filling with more rice, shaping it gently into a triangular onigiri. Be tender but firm enough so the onigiri holds its shape without crumbling. Wrap each rice ball with a half-sheet of toasted nori for a salty crunch and visually striking contrast.
Step 4: Add Finishing Touches
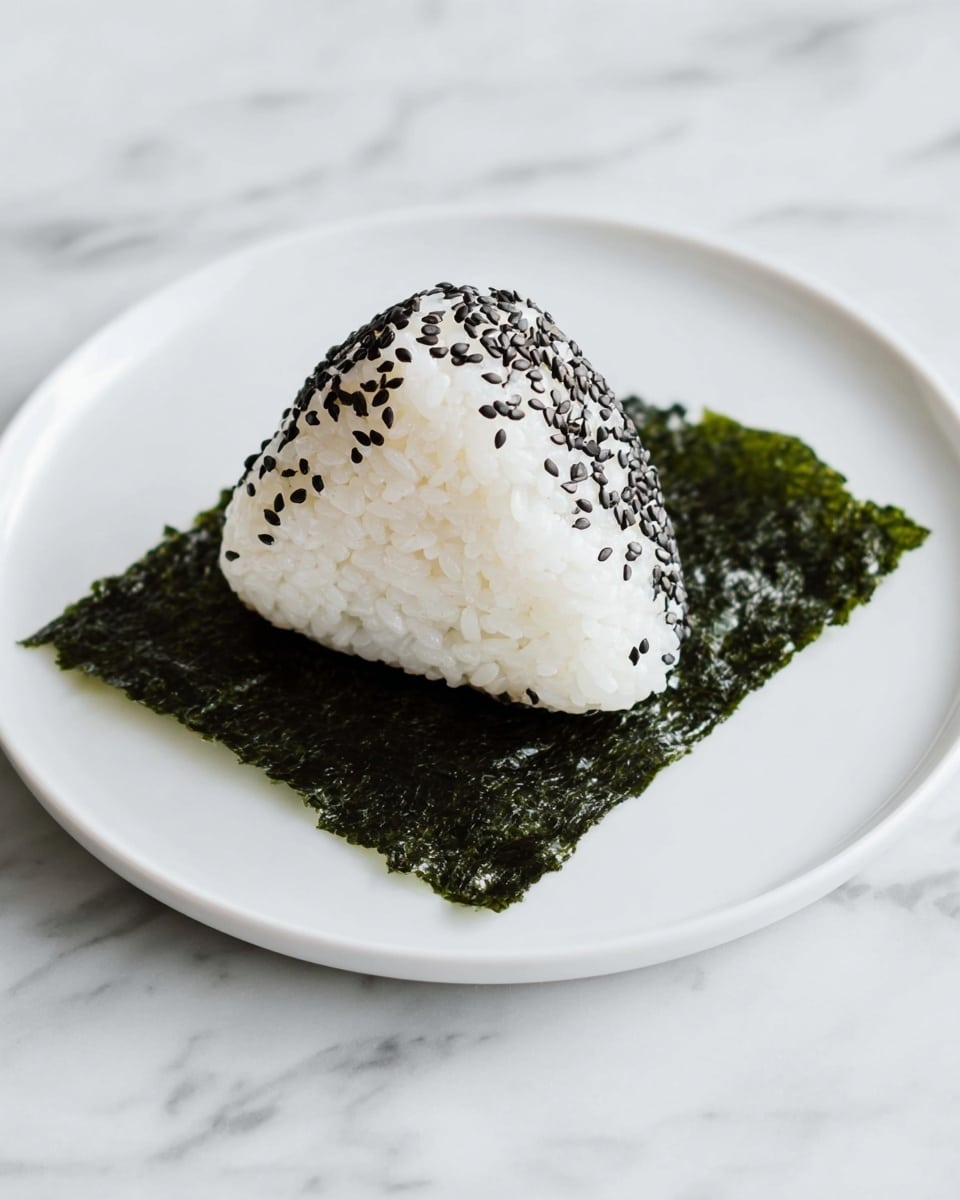
Sprinkle black sesame seeds over the outside of your onigiri for a beautiful look and subtle earthiness. For an extra burst of flavor and visual appeal, add a tiny spoonful of the spicy tuna mixture on top of each rice triangle before serving. These little details elevate your Spicy Tuna Onigiri Recipe from simple to spectacular.
How to Serve Spicy Tuna Onigiri Recipe
Garnishes
When it comes to garnishing your onigiri, toasted black sesame seeds offer a delightful crunch and color that complements the white rice beautifully. You can also add a sprinkle of finely chopped shiso leaves or a few pickled ginger slices for a touch of refreshing brightness that balances the spicy filling perfectly.
Side Dishes
Spicy Tuna Onigiri makes a fantastic centerpiece when paired with simple sides like a crisp cucumber salad dressed in rice vinegar and sesame oil, edamame lightly salted, or a miso soup that warms and soothes the palate. These accompaniments keep the meal balanced and satisfyingly diverse.
Creative Ways to Present
For a fun twist, try arranging your onigiri on a platter with decorative vegetable carvings or serve alongside colorful dipping sauces such as ponzu or additional sriracha mayo. Wrapping the onigiri in a pretty bamboo leaf or placing them in individual bento boxes jazzes up your presentation, perfect for impressing guests or elevating a homemade lunch.
Make Ahead and Storage
Storing Leftovers
If you have extras, store the onigiri in an airtight container in the refrigerator for up to 24 hours. Note that the rice may become firmer as it cools, but gently warming it before eating can help restore some softness.
Freezing
You can freeze these onigiri to enjoy later. Wrap each tightly in plastic wrap and place in an airtight bag. When ready to eat, thaw in the refrigerator overnight and reheat gently to revive the texture of the rice without drying out the filling.
Reheating
To reheat your Spicy Tuna Onigiri, use a microwave at medium power or steam them lightly to prevent the rice from drying out. Avoid high heat so the delicate flavors of the tuna filling remain fresh and vibrant.
FAQs
Can I use fresh tuna instead of canned tuna in this Spicy Tuna Onigiri Recipe?
Absolutely! Fresh tuna can give a lovely texture and flavor, especially if you enjoy sashimi-grade fish. Just be sure to finely dice it and mix with the other filling ingredients for the best consistency. Keep it chilled until use for safety.
What type of rice is best for making onigiri?
Japanese short-grain rice, often labeled sushi rice, is the best choice for onigiri because of its sticky texture that holds the rice balls together perfectly. Long-grain or medium-grain rice won’t bind as well and will fall apart.
How spicy is this Spicy Tuna Onigiri Recipe?
The recipe offers a moderate level of spice, balanced by creamy mayonnaise. You can adjust the amount of sriracha to suit your taste, either dialing it up for more heat or reducing it for a milder flavor.
Can I prepare the rice and filling ahead of time?
Yes! You can make the rice and tuna filling a few hours in advance and refrigerate both separately. Just bring the rice to room temperature before shaping to ensure it sticks well and the onigiri maintain their shape.
What’s the best way to eat onigiri?
Onigiri is typically eaten by hand, making it a perfect on-the-go snack or part of a picnic. Enjoy it as is or with a dipping sauce if you like a bit more flavor on the side.
Final Thoughts
This Spicy Tuna Onigiri Recipe is a total crowd-pleaser and incredibly rewarding to make at home. With its perfect balance of spicy, creamy filling and tender rice wrapped in crispy nori, each bite feels like a little celebration. Grab these ingredients, roll up your sleeves, and dive into creating your own delicious onigiri — it’s a taste of Japanese comfort food that you’ll want to make time and again!
Print
Spicy Tuna Onigiri Recipe
- Total Time: 50 minutes
- Yield: 4 to 6 servings (about 5-6 onigiri)
Description
Learn how to make delicious homemade Spicy Tuna Onigiri with this simple and authentic recipe. These Japanese rice balls are filled with a flavorful mix of canned albacore tuna, mayonnaise, sriracha, rice vinegar, and scallions, wrapped in toasted nori, and sprinkled with toasted black sesame seeds for a perfect snack or light meal.
Ingredients
Rice
- 1½ cups Japanese short-grain rice (sushi rice), about 2 rice cooker cups
- 15 fluid ounces (440 mL) cold water
- Kosher salt, for seasoning and shaping
Spicy Tuna Filling
- 1 (4.5-ounce) can Portofino Solid Albacore Tuna in Extra Virgin Olive Oil, drained
- 1½ tablespoons mayonnaise
- 1 teaspoon sriracha hot sauce
- ½ teaspoon rice vinegar
- 1 scallion (green parts only), finely sliced
Assembly
- Toasted black sesame seeds, for sprinkling (optional)
- 3 sheets toasted nori, cut crosswise in half
Instructions
- Prepare the rice: Place the rice in a fine-meshed sieve and rinse well under cold water, rubbing the grains between your fingers until the water runs clear. Drain thoroughly.
- Cook the rice: Combine the rinsed rice and cold water in a rice cooker and cook according to the manufacturer’s directions for perfect sushi rice texture. Alternatively, cook on the stovetop by bringing the rice and water to a boil in a medium non-stick saucepan, then reduce heat to low, cover, and simmer for 16 to 18 minutes until water is absorbed. Remove from heat, fluff gently, cover with a clean kitchen towel and lid, and let stand for 10 minutes.
- Make the filling: In a medium bowl, mix the drained tuna, mayonnaise, sriracha, and rice vinegar until evenly combined. Stir in the finely sliced scallions.
- Prepare for assembly: Set out a medium bowl of room temperature water and a small bowl of kosher salt for handling the rice.
- Shape the onigiri: Moisten your hands with water and lightly salt your palms. Take about ½ cup of sushi rice and shape it into a thick oblong in one palm. Place a tablespoon of the spicy tuna filling in the center and cover completely with rice. Gently shape into a wide triangular form without compressing the rice too hard, ensuring it holds together but remains light.
- Add finishing touches: Sprinkle the outside of each onigiri with toasted black sesame seeds if desired. Wrap each rice ball with a half sheet of toasted nori and place a small spoonful of the tuna filling on top.
- Serve: Serve the spicy tuna onigiri immediately for best texture and flavor.
Notes
- Use Japanese short-grain rice as it has the right stickiness for onigiri.
- Adjust sriracha amount to control spiciness to your preference.
- Keeping your hands wet and lightly salted prevents rice from sticking and seasons the onigiri.
- Onigiri is best enjoyed fresh but can be wrapped tightly and stored in the fridge for up to a day.
- If using stovetop method to cook rice, allow the resting time with lid on to achieve optimal texture.
- Prep Time: 20 minutes
- Cook Time: 30 minutes
- Category: Snack
- Method: Stovetop
- Cuisine: Japanese


