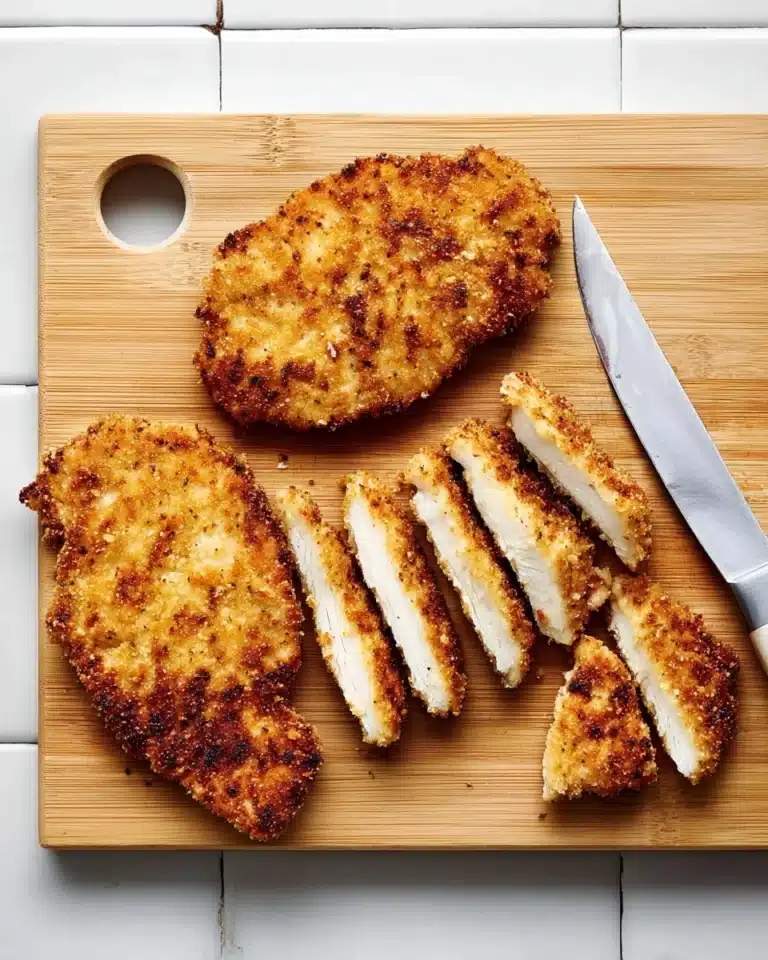
There is something incredibly satisfying about perfectly golden, crunchy chicken that melts in your mouth, and this Crispy Baked Chicken Cutlets Recipe delivers exactly that. Using simple pantry staples to create a beautifully textured coating that bakes up crisp in the oven, this dish feels indulgent without the fuss of frying. The balance of spices, Parmesan, and panko breadcrumbs gives these cutlets a flavorful, crispy exterior that keeps the juicy chicken inside tender and delicious. Trust me, once you try this recipe, it will quickly become your go-to for a weeknight dinner or a weekend treat.
Ingredients You’ll Need

These ingredients are straightforward yet thoughtfully chosen to bring out the best flavor, juiciness, and crunch in your chicken cutlets. Each one plays an essential role — from the cornstarch that helps the batter stick, to the blend of spices that infuses the crust with warmth and depth.
- 3 large chicken breasts: Sliced and pounded thin for quick, even cooking and a tender bite.
- 1 large egg: Acts as a binder so the coating adheres perfectly.
- 1 teaspoon lemon juice: Adds a hint of brightness to the egg wash, enhancing flavor.
- Oil spray: Ensures the breading crispness without deep frying.
- 1/4 cup cornstarch: Creates a light, crispy base layer beneath the panko crumbs.
- 1 teaspoon sea salt: Essential seasoning to bring out all the flavors.
- 1/4 teaspoon baking soda: Helps tenderize the chicken and improve texture.
- 1/2 teaspoon each ground paprika, garlic powder, and onion powder: This spice trio gives the crust a rich, savory kick.
- Ground black pepper (to taste): Adds subtle heat and complexity.
- 1 1/2 cups panko breadcrumbs: The star of the crispy coating, providing that irresistible crunch.
- 1/4 cup grated Parmesan: Introduces a salty, nutty flavor that elevates the breading to something truly special.
- 1/4 teaspoon each ground paprika, garlic powder, and onion powder (for panko mix): Reinforces the crust’s flavor in every bite.
- 1/2 teaspoon sea salt (for panko mix): Balances the other flavors perfectly.
- Ground black pepper (to taste for panko mix): Adds mild peppery warmth.
How to Make Crispy Baked Chicken Cutlets Recipe
Step 1: Prep Your Oven and Tools
Start by preheating your oven to 425°F. Place a sheet pan with an oven-safe wire rack inside. This setup allows hot air to circulate around the chicken, ensuring the crispiness you’re aiming for. Getting this ready early means a better baking experience, as your oven and pan will be perfectly heated once your cutlets are breaded.
Step 2: Butterfly and Pound the Chicken
Halve each chicken breast lengthwise to create thinner cutlets. Then, gently pound the thicker sections until the pieces are of even thickness. This step is key because it helps the chicken cook evenly and stay juicy without drying out.
Step 3: Assemble the Breading Station
Create three shallow bowls: one for cornstarch mixture, one for the beaten egg with lemon juice, and one for the seasoned panko-Parmesan blend. This setup makes the breading process smooth and mess-free, helping each cutlet get perfectly coated in layers.
Step 4: Dredge, Dip, and Coat the Cutlets
First, dredge each cutlet in cornstarch, tapping off excess. Then dip into the egg wash, making sure every bit of the chicken is covered. Finally, lay the cutlet in the panko mixture and use a spoon or measuring cup to press crumbs onto both sides firmly. This careful coating builds the foundation for your crispy crust and keeps it intact during baking.
Step 5: Rest Before Baking
Let your breaded cutlets rest on a plate for 10 minutes. This resting step helps the coating set so it won’t fall off while baking, creating the perfect crunchy exterior you want for this Crispy Baked Chicken Cutlets Recipe.
Step 6: Bake to Perfection
Carefully take the hot pan and rack out of the oven and spray the rack lightly with oil to prevent sticking. Spray both sides of each cutlet with oil, then place them sprayed-side down on the rack. Bake for 10 to 16 minutes depending on chicken thickness, until golden brown and cooked through. For an extra crunch boost, broil for 1 to 2 minutes at the end. Serve immediately for the best texture.
How to Serve Crispy Baked Chicken Cutlets Recipe

Garnishes
A sprinkle of freshly chopped parsley or a wedge of lemon to squeeze over the top instantly brightens the dish. You can also add freshly shaved Parmesan or a drizzle of garlic-infused olive oil to elevate the crisp-coated chicken cutlets further.
Side Dishes
This recipe pairs beautifully with fresh green salads, roasted vegetables, or creamy mashed potatoes. For a lighter option, try with a quinoa and herb mix or sautéed greens. The crispy texture and robust flavors in the cutlets stand out especially well next to simple sides that balance out the richness.
Creative Ways to Present
Try serving these cutlets thinly sliced over a bed of pasta tossed in olive oil and fresh herbs for a more substantial, rustic meal. You can also turn your Crispy Baked Chicken Cutlets Recipe into delicious sandwiches with fresh lettuce, tomato, and a smear of aioli or pesto for a satisfying lunch or casual dinner.
Make Ahead and Storage
Storing Leftovers
Once cooled, store any leftover crispy baked chicken cutlets in an airtight container in the refrigerator for up to 3 days. Keeping the breading intact helps maintain some of that wonderful crispness.
Freezing
You can freeze these cutlets by placing parchment paper between each piece to prevent sticking, then sealing them in a heavy-duty freezer bag for up to 2 months. Just thaw overnight in the refrigerator before reheating.
Reheating
For best results, reheat leftovers in a 375°F oven for about 10 minutes on a wire rack. This method crisps the breading back up more effectively than the microwave, maintaining the delightful texture of your Crispy Baked Chicken Cutlets Recipe.
FAQs
Can I use chicken thighs instead of breasts?
Absolutely! You can butterfly and pound boneless, skinless chicken thighs for a juicier, more flavorful variation. Just keep in mind thighs may have slightly different cooking times due to their thickness.
Is it necessary to use Parmesan in the breading?
While not mandatory, Parmesan adds a wonderful salty, nutty depth that enhances the crust’s flavor and texture. You can omit it if needed but the breading will lose a bit of its savory complexity.
How do I make sure the breading sticks well during baking?
The key is the three-step breading process: cornstarch first, then egg wash, then panko mixture firmly pressed on both sides. Letting the cutlets rest before baking also helps the coating set and adhere properly.
Can I prepare the cutlets ahead of time before baking?
Yes! You can bread the cutlets and keep them refrigerated for up to 1 day before baking. Just cover them tightly with plastic wrap to prevent drying out and bake when ready.
What can I do to make this recipe gluten-free?
Swap out the panko breadcrumbs for gluten-free breadcrumbs and double-check that your seasoning blends do not contain gluten. The rest of the ingredients are naturally gluten-free, making this an easy adjustment.
Final Thoughts
This Crispy Baked Chicken Cutlets Recipe is a total winner when you want a satisfying, crispy dinner that’s both easy and impressive. I truly love how simple ingredients combine to create such a flavorful and crunchy dish without deep-frying. Give it a try and watch how quickly it becomes a family favorite in your kitchen!
Print
Crispy Baked Chicken Cutlets Recipe
- Total Time: 45 minutes
- Yield: 6 servings
Description
Crispy Baked Chicken Cutlets offer a healthier alternative to fried chicken by using an oven-baking method that results in a crunchy, flavorful crust with tender, juicy meat inside. This recipe uses a panko and Parmesan breadcrumb coating, ensuring a satisfying crunch without the need for deep frying, perfect for a quick and delicious family dinner.
Ingredients
Chicken and Egg
- 3 large chicken breasts
- 1 large egg
- 1 teaspoon lemon juice
- Oil spray, as needed
Cornstarch Coating
- 1/4 cup cornstarch
- 1 teaspoon sea salt
- 1/4 teaspoon baking soda
- 1/2 teaspoon ground paprika
- 1/2 teaspoon garlic powder
- 1/2 teaspoon onion powder
- Ground black pepper, to taste
Panko Breadcrumb Coating
- 1 1/2 cups panko breadcrumbs
- 1/4 cup grated Parmesan cheese
- 1/4 teaspoon ground paprika
- 1/4 teaspoon garlic powder
- 1/4 teaspoon onion powder
- 1/2 teaspoon sea salt
- Ground black pepper, to taste
Instructions
- Prep: Preheat your oven to 425°F. Place a sheet pan with an oven-safe wire rack inside the oven to heat up as it preheats. This will help the chicken bake evenly and get crispy.
- Butterfly chicken: Slice each chicken breast lengthwise to create cutlets. Pound the thicker parts with a meat mallet or rolling pin until the pieces have an even thickness, ensuring uniform cooking.
- Assemble breading station: Prepare three separate shallow bowls for coating the chicken.
- Prepare egg wash: In the second bowl, beat the egg together with the lemon juice thoroughly to combine.
- Mix cornstarch coating: Whisk together the cornstarch, sea salt, baking soda, paprika, garlic powder, onion powder, and black pepper in the first shallow bowl.
- Mix panko coating: In the third bowl, combine the panko breadcrumbs, grated Parmesan, paprika, garlic powder, onion powder, sea salt, and black pepper evenly.
- Bread chicken: Dredge each cutlet first in the cornstarch mixture, shaking off the excess. Then dip into the egg wash, ensuring full coverage with no dry areas. Next, place the chicken into the panko bowl; use a spoon to press the crumbs firmly onto both sides for a well-adhered, crispy coating.
- Rest: Let the breaded chicken cutlets rest on a plate for 10 minutes to allow the coating to set, which helps it adhere better during baking.
- Bake: Carefully remove the preheated pan and wire rack from the oven. Spray or brush the rack lightly with oil. Spray the top of each breaded cutlet, then place it sprayed side down on the rack; spray the other side as well. Arrange all cutlets on the rack. Bake for 10 to 16 minutes until the chicken is cooked through and the crust is golden brown. For extra crispiness, broil the cutlets for 1 to 2 minutes at the end, watching carefully to avoid burning. Serve immediately.
Notes
- Note 1: Adding lemon juice to the egg wash brightens flavor and helps tenderize the chicken.
- Note 2: Panko breadcrumbs create a lighter, crispier crust compared to traditional breadcrumbs.
- Note 3: Pressing the breadcrumbs firmly ensures a crispy coating that adheres well while baking.
- Use an oven-safe wire rack to allow air circulation around the chicken, promoting even browning and crispiness.
- Broiling briefly at the end enhances the crunch but be cautious to prevent burning.
- Prep Time: 15 minutes
- Cook Time: 16 minutes
- Category: Main Course
- Method: Baking
- Cuisine: American